


What Is Vault & Why Use It?
HashiCorp Vault is like a digital safe for storing secrets — think passwords, API keys, tokens, or anything sensitive. Instead of keeping those values in .env files or plaintext notes, Vault encrypts and protects them.
With just a few commands, you can set up your Mac to behave like a personal Vault server.
What You’ll Need
- Mac with Homebrew installed
- Internet connection
- Terminal access
- Patience (don’t worry — I’ll guide you!)
Step-by-Step: Setting Up Vault Locally on macOS
1. Install Vault Using Homebrew
# Install Vault
brew tap hashicorp/tap
brew install hashicorp/tap/vault

# Verify Vault Installation
vault -version
2. Locate Vault Installation
# CD to directory where homebrew installs
cd "$(brew --prefix)"

# Run ls command to look for installation of Vault
ls
On my machine, Vault was installed under:
/usr/local/opt/vault
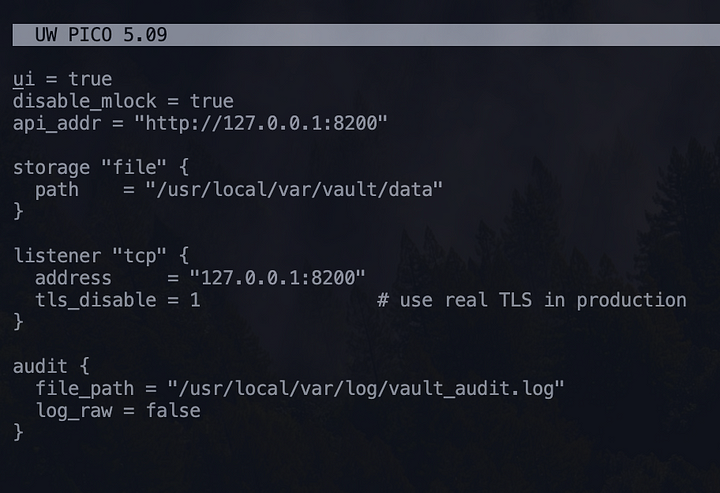
3. Create the Vault Configuration File
Create the configuration file:
nano /usr/local/etc/vault.hclPaste this configurations:
ui = true
disable_mlock = true
api_addr = "http://127.0.0.1:8200"

storage "file" {
  path = "/usr/local/var/vault/data"
}

listener "tcp" {
  address     = "127.0.0.1:8200"
  tls_disable = 1
}

audit {
  file_path = "/usr/local/var/log/vault_audit.log"
  log_raw   = false
}
✅ ui = true gives us a web interface
✅ disable_mlock = true is needed on macOS
✅ audit lets you log who accesses what
4. Modify Vault’s plist File (Startup Settings)
Modify this file:
nano /usr/local/opt/vault/homebrew.mxcl.vault.plistReplace:
<string>-dev</string>With:
<string>-config</string>
<string>/usr/local/etc/vault.hcl</string>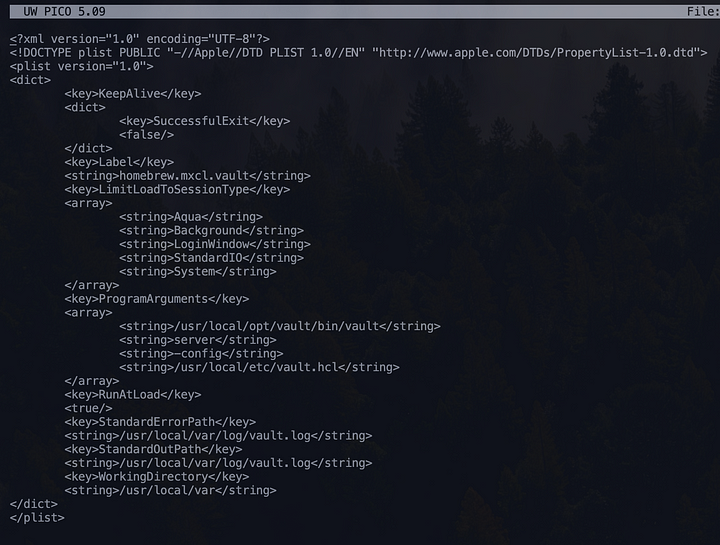
5. (Optional) One-Liner to Patch It Automatically
If you’re comfortable with Terminal, you can patch it like this:
pl="$(brew --prefix)/opt/vault/homebrew.mxcl.hashicorp~tap~vault.plist"
sed -i '' 's/-dev/-config\/usr\/local\/etc\/vault.hcl/' "$pl"
6. Add Vault Address to Your Shell Config
Append this line to ~/.bash_profile (or .zshrc if you use zsh):
export VAULT_ADDR='http://127.0.0.1:8200'Then apply the change:
source ~/.bash_profile7. Start Vault as a Background Service
brew services start hashicorp/tap/vault8. Check Vault Status
vault statusExpected output:
Initialized: false
Sealed: true
...
9. Initialize the Vault
This command sets up your Vault:
vault operator init -key-shares=1 -key-threshold=1You’ll get two important values:
- Unseal Key
- Initial Root Token
Save these somewhere safe! If you lose them, you can’t access your Vault.
10. Log In via Vault Web UI
Open your browser and go to http://127.0.0.1:8200/ui, you should be able to see the following screen:
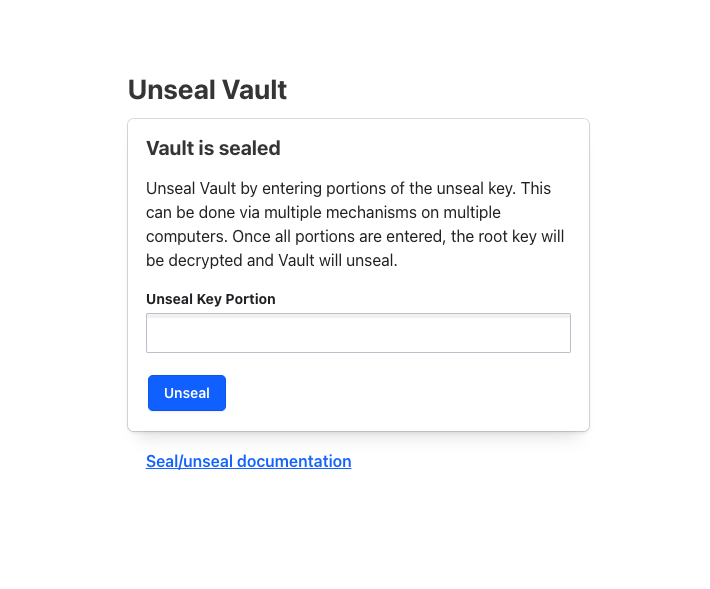
Steps:
- Enter your Unseal Key
- Click Unseal
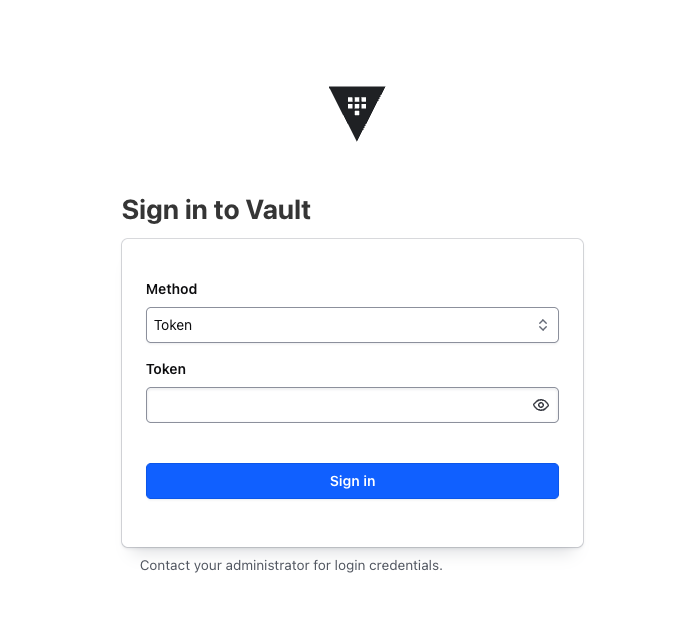
Steps:
- Use your Root Token to sign in
On successful sign in, you should be able to see the following screen:
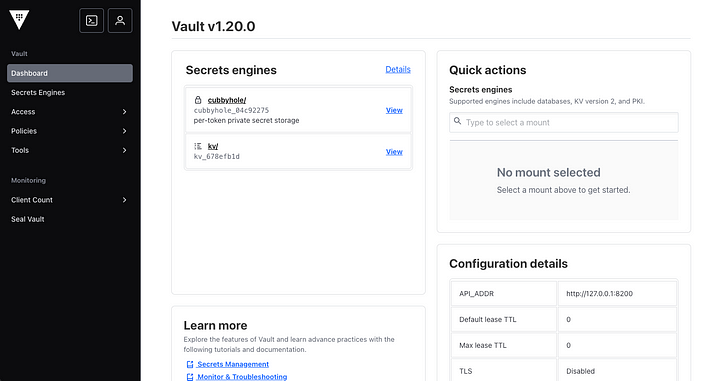
Try Saving a Secret
Once you’re logged in:
- Click on Secrets Engine
- Enable new engine, Key/Value (KV), if not yet enabled
- On Secrets Engine, you should be able to see kv/ then click on it
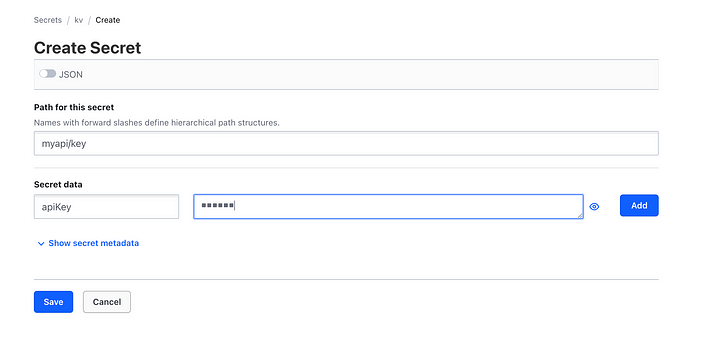
- Create a secret like
myapi/key, add the fields for the secret then click save
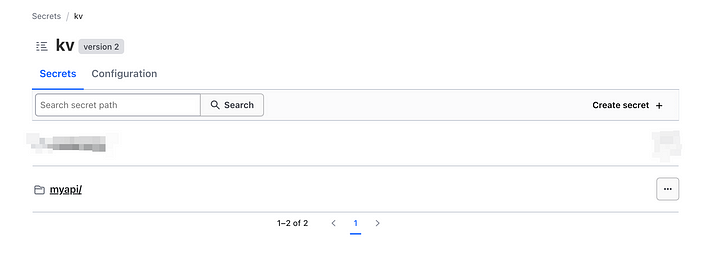
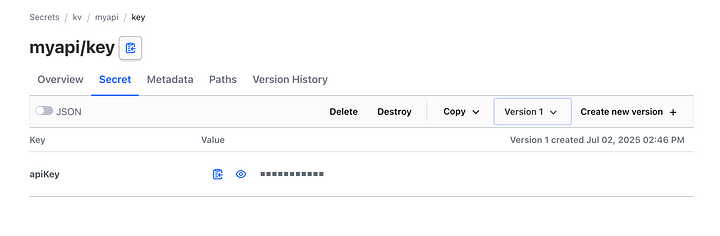
Try Viewing a Secret
- Navigate back to kv/ list and click on your created secret:
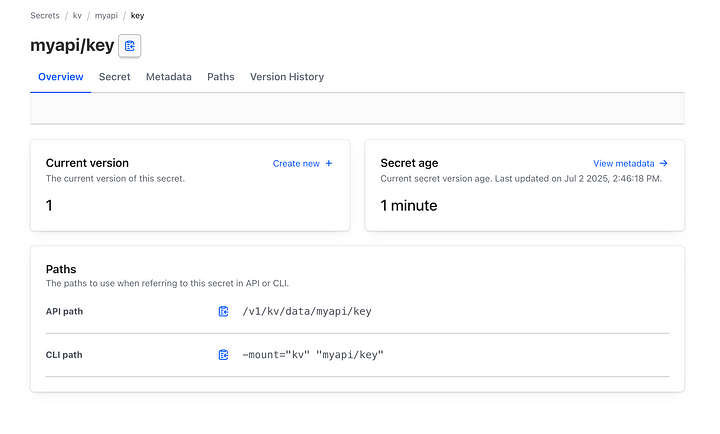
2. Click on your created secret:
Congratulations! You’re Now Using Vault
You’ve turned your Mac into your own secret vault. From here, you can:
- Store personal tokens and credentials safely
- Use CLI or Web UI to access or modify secrets
- Log access events with audit logs
For more detailed documentation of Vault, you may visit https://developer.hashicorp.com/vault.
Comments
Post a Comment